OLLVM 빌드 방법
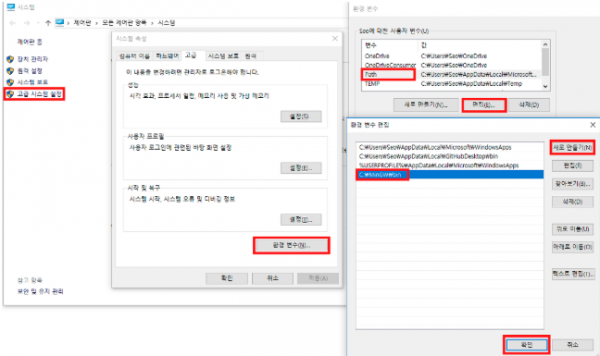
- C:\Program Files\mingw-w64\x86_64-7.2.0-posix-seh-rt_v5-rev1\mingw64\bin 경로 등록
- cmd -> "gcc" 입력해보기
2) cmake 설치
- windows 버전으로 설치 (.msi)
- Release Candidate (3.14)
3) OLLVM 설치
- Python 2.7 써야함
4) ndk18-b 설치
5) ollvm 세팅
- C:\Users\linfourm\android-ndk-r18b-windows-x86_64\android-ndk-r18b\toolchains 폴더로 가서 ollvm 폴더를 만든다.
- 타 폴더처럼 prebuilt\windows-x86_64 폴더를 만든다.
- make로 빌드한 build 폴더에 bin, lib 폴더를 복사한다.
- setup.mk 파일을 열어 위에 두줄을 주석처리 후 아래 3줄과 같이 추가한다.
NDK_TOOLCHAIN_VERSION := clang
- application.mk에서 clang 으로 바꾼다.
LOCAL_CFLAGS += -mllvm -fla -mllvm -sub_loop=10 -mllvm -bcf_loop=5 -mllvm -split -mllvm -split_num=10
- Android.mk에서 추가한다. (알아서 강도 설정)
- 참고 : https://github.com/obfuscator-llvm/obfuscator/wiki
* 윈도우 실행 시 에러날 경우 - /dev/random
\ obfuscator-llvm-4.0 \ lib \ Transforms \ Obfuscation \ CryptoUtils.cpp 소스 코드를 수정해줘야 한다.
bool CryptoUtils::prng_seed() 내부 함수에서 에러가 발생하는데, 아래와 같이 바꿔준다.
1 2 3 4 5 6 7 8 9 10 11 12 13 14 15 16 17 18 19 20 21 22 23 24 25 26 27 28 29 30 31 | #include <windows.h> // 헤더도 넣자 #include <wincrypt.h> #include <Ntsecapi.h> ... bool CryptoUtils::prng_seed() { #if defined(_WINDOWS) ... } else { // 삽입 HCRYPTPROV prov; if (CryptAcquireContext(&prov, 0, 0, PROV_RSA_FULL, CRYPT_VERIFYCONTEXT | CRYPT_SILENT)) { if(!CryptGenRandom(prov, 16, (BYTE *) key)) errs()<<"CryptGenRandom failm\n"; CryptReleaseContext(prov, 0); memset(ctr, 0, 16); // Once the seed is there, we compute the // AES128 key-schedule aes_compute_ks(ks, key); seeded = true; return true; } errs()<<"Cannot open /dev/random\n"; return false; } ... } |
이렇게 하면 삽질을 줄일 수 있다...
- ollvm\lib\Transforms\Obfuscation <- cpp
- ollvm\include\llvm\Transforms\Obfuscation <- header
- llvm\lib\Transforms\IPO\PassManagerBuilder.cpp


